That fresh finish looks incredible right now. Smooth, clean, and exactly what you paid for. But here in Florida, the ‘honeymoon phase’ lasts about five minutes. Once the pool resurfacing is done, your new surface is at its most vulnerable the moment the water hits it. Most failed finishes aren’t caused by bad plaster. They’re caused by a rushed or improper startup.
We put this guide together to show you exactly how to brush, balance, and baby your pool through the first few days so that the finish actually lasts.
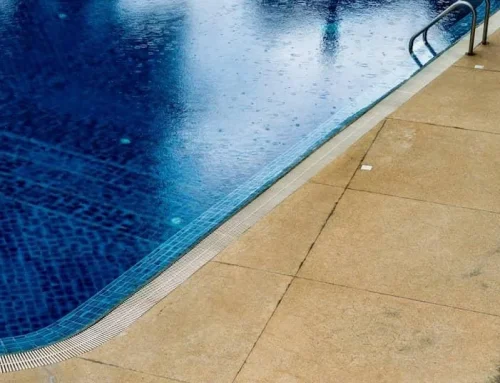
The First 24–72 Hours After Pool Resurfacing
The first few days matter more than most pool owners realize. A newly resurfaced pool won’t feel like a finished product the second the pool builder packs up. In fact, the entire surface often feels slightly gritty. This is normal. As the pool plaster finish begins curing, a fine plaster dust forms and settles into the pool water. This residue can make the swimming pool look cloudy and leave a light film on the pool floor and walls.
At this stage, the color might look uneven, but that doesn’t mean the swimming pool resurfacing was a failure. The pigments in your newly plastered pool finish haven’t stabilized yet. Until you brush the entire pool daily and manage the water chemistry, the plaster surface is still in transition. Think of this as a “work in progress.” What you do now determines how the entire pool surface hardens and how long that pool finish actually lasts.
How Pool Surfaces Cure After Installation

Once you begin filling the pool, the surface material begins strengthening from the inside out. While different surfaces have different needs, the initial start-up procedure is critical for all cement-based finishes.
What “Curing” Means for Your New Pool Plaster Project
Curing isn’t “drying”. It’s a chemical reaction called hydration. Pool plaster and other cement-based finishes need constant contact with water to harden. If the pool shell dries out or the alkalinity and calcium hardness swing too far, the finish can weaken or crack, leading to costly repairs. This is why proper pool maintenance, specifically balancing water chemistry and aggressive manual brushing to manage plaster dust, is vital during the first few weeks.
These are the typical curing timelines and maintenance:
|
Pool Plaster |
Brush daily & check calcium hardness |
Up to 28 days |
|
Quartz & Glass Beads |
Faster stabilization |
7–14 days |
|
Pebble & Aggregate |
Durable but sensitive to water balance |
10–14 days |
Pro Tip: During the pool resurfacing process, you must operate filtration system continuously to prevent plaster dust buildup. Make sure to test fill water before you even start the garden hose on fill day preparation. High calcium hardness levels in your tap water can affect the new pool plaster project before the pool is even full.
Brushing Requirements During the Startup Period
As soon as curing starts, your brush is your main tool. Even if the pool water looks clear, the plaster is still releasing minerals. If you don’t brush, these particles settle and harden, creating a rough, sandpaper-like texture. Most resurfacing problems happen because plaster dust stays on the floor too long, not because of the crew.
Why a Newly Plastered Pool Finish Must Be Brushed
Think of brushing as the final stage of the pool resurfacing process. It’s not optional upkeep; it’s part of the construction.
-
- To Remove Plaster Dust: Fine calcium particles are released as the surface material hydrates. You need to brush the entire pool to keep that dust suspended so the filtration system can catch it. If you don’t remove plaster dust, it bonds back to the pool floor, creating permanent rough spots.
-
- To Promote Even Curing: Consistent brushing helps the entire surface hydrate at the same rate. This is the only way to prevent the splotchy, uneven pool plaster finish that happens when the newly resurfaced pool is neglected.
Recommended Brushing Frequency
Consistency matters more than force. You want a smooth texture, not a workout. Use a brush designed for your specific pool finish (nylon for plaster, or a combo brush for pebble).
-
- The First Week: Brush the entire pool at least twice a day. Pay extra attention to the waterline tile, steps, and corners where plaster dust buildup likes to hide.
-
- Weeks Two through Four: Drop down to once-daily brushing. Even if the water looks crystal clear, the new pool plaster finish is still stabilizing underneath.
Water Chemistry During the First 30 Days
Brushing is only half the battle; you also have to manage the proper water chemistry. During the first month, the finish and the water are in a constant chemical tug-of-war.
Why Chemical Balance Is Critical for New Pool Plaster
A newly plastered pool finish naturally releases minerals into the water, which spikes the alkalinity and calcium hardness. Without a strict pool finish startup procedure, these swings cause scaling or “mapping” cracks before the first few weeks are even over.
Key Levels to Monitor
To avoid costly repairs, you’ll need to balance water daily using this cheat sheet:
|
Parameter |
Target Range |
Why It Matters |
|
pH Level |
7.2–7.6 |
Prevents a rough plaster surface and calcium scaling. |
|
Alkalinity |
80–120 ppm |
Stops the pH from swinging wildly. |
|
Calcium Hardness |
150–200 ppm |
Protects the pool shell from being “eaten” by hungry water. |
|
Chlorine |
Low / Trace |
High pre-diluted chlorine can stress a fresh finish too early. |
Pro Tip: Never pour muriatic acid directly onto the floor. Always use pre-diluted muriatic acid and pour it into the water flow near a return jet to ensure it mixes. You should also operate the filtration system continuously during this window to keep the water moving and ensure it immediately captures any loose debris.
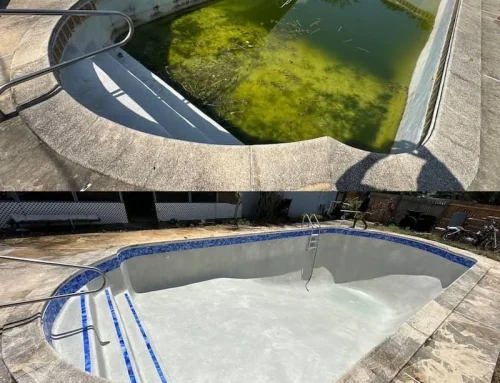
What Is Normal vs. What Signals a Problem?
During the first few weeks, your newly resurfaced pool is going to go through some awkward changes. Some of these are just part of the curing process, while others mean you need to call your pool builder immediately. Most minor issues, like lingering dust, fade as you brush consistently and balance water levels.
However, structural issues or bonding failures in the pool shell won’t fix themselves. Here is how to tell if your pool plaster project is on track:
|
The “Look” |
Normal During Curing |
Possible Red Flag |
|
Water Clarity |
Light cloudiness from plaster dust |
Oily films or green algae buildup |
|
Surface Color |
Mild shading or “mottling” |
Harsh white streaks or deep brown stains |
|
Smooth Texture |
A fine, even grit (like high-grit sandpaper) |
Flaking, peeling, or sharp “crazing” cracks |
|
Water Level |
Minor evaporation in the Florida heat |
Noticeable daily loss (leaking pool shell) |
Pro Tip: If you see the plaster surface actually lifting or if your alkalinity and calcium hardness won’t stay in range no matter how much muriatic acid you add, call your installer. It’s better to catch a surface material issue now than to face costly repairs next season.
When Can You Actually Use the Pool Again?
We know you’re dying to jump into your backyard oasis, but rushing the pool finish startup procedure is the fastest way to ruin your investment.
Swimming
You can usually jump back into the swimming pool once the pool water is crystal clear and you’ve achieved proper water chemistry (usually 3 to 7 days). Just remember: the plaster startup procedure is still happening under your feet, so avoid any abrasive toys, athletic games, or heavy “jumping” off the edge for the first 14 days to protect the soft surface.
Equipment & Accessories
This is where most pool owners make mistakes. Your equipment needs to stay off or out of the pool to protect the newly plastered pool finish:
-
- Pool Heater: Keep the pool heater turned off for at least 3 weeks. Turning it on too early can cause calcium scale to break off and permanently stain the pool finish.
-
- Automatic Cleaners & Vacuums: Do not use any automatic cleaners, robotic vacuums, or even manual vacuum heads for at least 28 days. The wheels and suction can leave permanent “ruts” or white tracks in the plaster before it fully hardens. Brushing is your only tool for the first month.
-
- Filtration System: You must operate the filtration system continuously for the first 72 hours to remove plaster dust and keep water flow moving. Ensure you are cleaning or backwashing your filter frequently during this time as it will clog quickly with plaster dust.
Long-Term Maintenance
After the first 30 days, your resurfaced pool is ready for a standard routine. Unlike vinyl liners or fiberglass pools, a concrete pool with a fresh pool plaster finish requires periodic cleaning and consistent monitoring of cyanuric acid levels to stay vibrant.
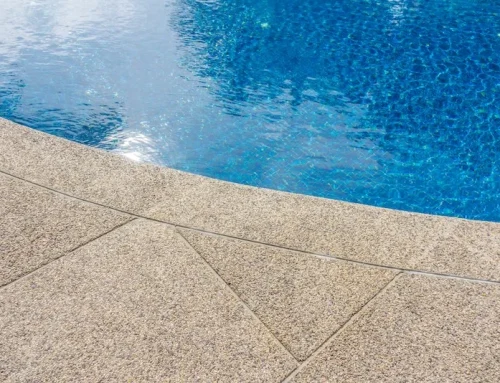
How Proper Startup Care Extends Your Pool’s Life
The first 28 days dictate whether your swimming pool resurfacing lasts five years or fifteen. When you support the curing process with aggressive brushing and steady water chemistry, the surface reaches its maximum density.
That density is your best defense. A well-cured pool finish stays smooth, resists ugly metal staining, and keeps its pigment. If you skip proper startup care, you’ll likely deal with “scaling” (which turns the floor into sandpaper) or “etching” (which eats away the pool plaster). Once that damage is done, you can’t just “clean” it off. You’re usually stuck with it until the next pool plaster project. Doing it right the first time is the only way to delay wear and keep your backyard oasis looking brand new.
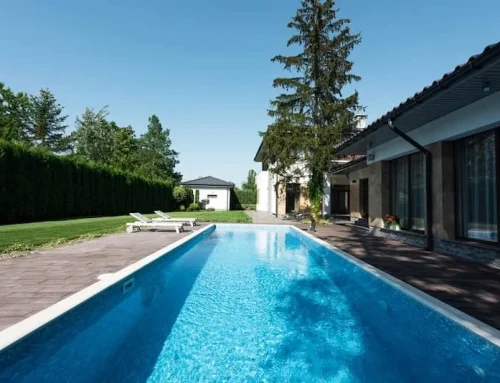
Protecting Your Investment from Day One
A newly resurfaced pool is a major investment, and in the harsh Florida climate, the margin for error is slim. Between the high pool’s temperature and the humidity, your filtration system and proper water chemistry have to be on point from the moment the garden hose stops.
Whether you’ve upgraded to glass beads, intricate glass tile, or a classic pool plaster finish, the strength of the pool shell depends on the “startup” phase. At Creative Resurfacing Solutions, we’ve seen that the best materials in the world can’t save a pool that wasn’t brushed or balanced correctly in week one.
A few final things to remember:
-
- Watch the Water: Make sure your waterline tile stays clean and that the pool isn’t overflowing, as both can mess with your alkalinity and calcium hardness balance.
-
- Keep it Clear: Run the filtration system continuously to prevent plaster dust from settling and bonding.
-
- Stay Consistent: Proper pool maintenance isn’t a weekend hobby for a fresh finish; it’s a daily commitment for the first month.
Protect the surface today, and your pool will perform and look exactly the way it was meant to for years to come.